Solving Niche Problems Quickly With 3D Printing
The most recent 3D printing project I wrote about was a months-long process of design and iteration, but one skill I’m particularly interested in honing with my 3D printer is solving niche problems quickly.
3D printing is particularly good for this because it’s relatively quick, doesn’t require time and energy to buy materials (assuming you have a stockpile of filament) or components¹, and is fully bespoke. It elongates the long-tail of physical objects; even if no one else in the world has the problem you do, you can rapidly produce an object to fix it. I think the quicker I can be at designing models that solve the small annoyances, the more likely I am to actually make those quality-of-life improvements instead of letting it be.
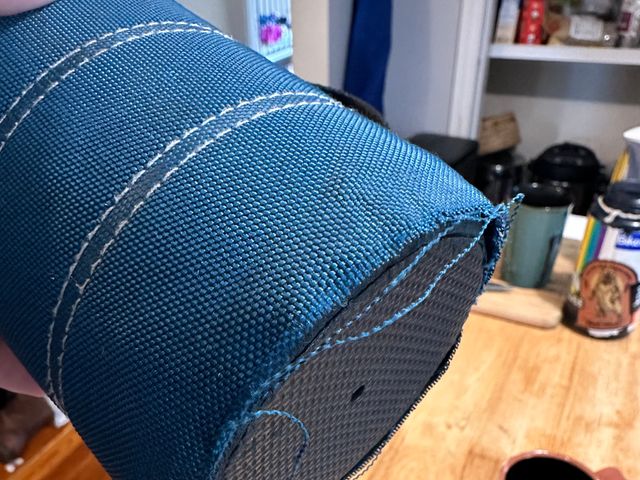
This weekend I had a houseguest with a small problem – a travel mug with a woven exterior which had come detached at the base and was fraying.

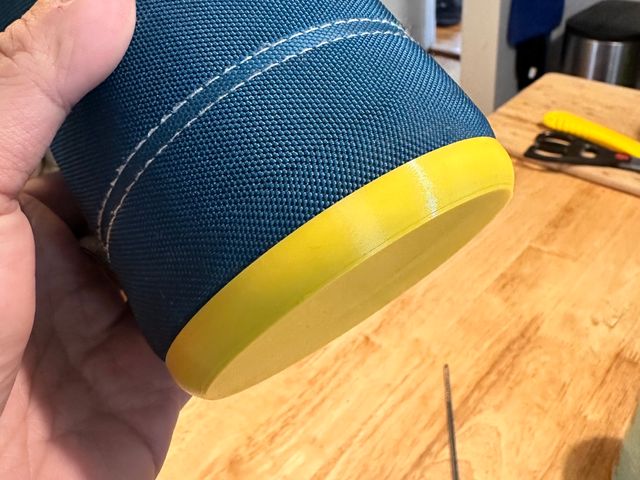
I proposed to print a plastic cap that the bottom of the mug could tuck into to cover the frayed edges and prevent further damage. With some calipers I set to work measuring and pulled together some quick OpenSCAD code to generate a model:
include <BOSL2/std.scad>;
$fa = $preview ? 5 : 0.5;
$fs = $preview ? 5 : 0.2;

INNER_WIDTH = 90;
INNER_HEIGHT = 8;
THICKNESS = 1.5;

cyl(
    d = INNER_WIDTH,
    h = INNER_HEIGHT + THICKNESS,
    rounding1 = ROUNDING,
    teardrop = true,
);
A few notes on this code for those interested in modeling or OpenSCAD in particular – feel free to skip over if you just want to see the results:
-
$faand$fsare special variables in OpenSCAD that control how close to a real curve rounded parts are.$fadefines the maximum angle that can be covered by a single line segment. So, for example, at$fa = 45every circle would be made up of 8 straight lines, making each circle an octagon. At$fa = 5a circle will be made up of 72 straight lines.$fsis the minimum length of a line segment, so if a circle is sufficiently small in radius, it will be broken up into fewer segments than a larger one. The trade off here is that more line segments will take longer to render, so I’ve defined these such that when you’re previewing the object while editing it, it uses relatively large segments, but when you’re rendering it, it uses smaller ones to make the curves very smooth. -
It got a brief mention in my whistle stand post, but I use the BOSL2 library for OpenSCAD, which provides a lot of niceities that don’t come built into the language. In this case I’m using BOSL2’s
cylmodule instead of OpenSCAD’s built-incylinderbecause the BOSL2 module provides rounding and chamfering options. -
The
rounding1argument on thecylmodule creates a cylinder with a rounded base. Somewhat less obvious is theteardropargument, which enforces a maximum shallowness of the angle on the rounded bottom, by default 45°. This is helpful for 3D printing because outward angles can produce “overhangs” where filament is extruded fully or partially in mid-air. If your overhangs are insufficiently supported (either by the model itself or added supports that are designed to be removed in post-processing) the extruded plastic might droop or fall and the print may fail – or come out unattractive or fragile. 45° is generally a safe angle to print at without additional supports.[Javascript required to view 3D model]
You might notice that, weirdly, I modeled this shape solid without a hollow inside that the cup might slot into! In fact I had previously created a more complex design modeled as a bowl shape.
But midway through modeling I realized this object is a great candidate for “vase mode.” Typically when printing an object, the “slicer”² slices³ a model into horizontal layers and creates a linear path for extruding the plastic on each layer. But most slicers provide a vase mode option, in which the first few layers are (optionally) printed solid and the rest is extruded as a long spiral upwards, creating an object with a single-walled perimeter. Vase mode has a number of advantages:
- Vase mode prints are generally quicker both because they use less filament and because they eliminate nozzle movement that isn’t extrusion as well as reducing things like retractions⁴.
- They also eliminate “seams” – places on a print where a layer started and finished, which often produces a visible line running up the side of a print.
Vase mode is appropriate for models that are a solid object for which you want to print the outer walls with an open top (like a vase). This object was a perfect candidate and in checking both approaches in my slicer, the standard mode with the bowl shaped model was estimated to take 58 minutes and 50¢ of filament, versus the vase mode which was 25 minutes and 23¢ of filament⁵.
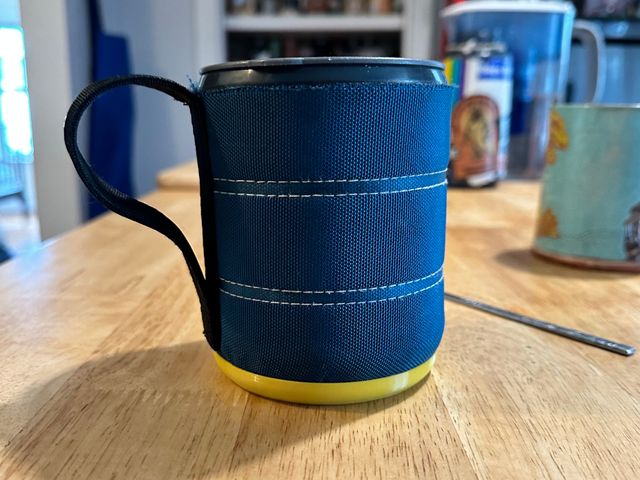
The final result fit neatly on the mug and the process took me roughly 30 minutes for modeling and an hour of inactive time for printing – because I messed up the first model by not enabling teardrop rounding. Composing this write up took me longer than designing the model. A pretty quick solution, all told, and, in my opinion, a not unattractive one.


In general, this is true, but there are occasions when one might integrate non-printed components into printed assemblies when you need different properties, for example threaded metal insets can provide a more durable screw connection than a printed thread. ↩︎
Software that generates the g-code for the printer which issues specific instructions for where to move the nozzle, how hot to make it, how much pressure to use to push filament through it, etc. ↩︎
Hence the name. ↩︎
In which filament is retracted up out of the printhead to reduce oozing when the printer has stopped extruding a line and is moving to a new location. ↩︎
It’s possible I could have narrowed the gap a bit by configuring the bowl model to have a thinner wall, but I expect there still would have been a difference and the model would still be smoother printed in vase mode. ↩︎