Converting an old iMac to a 5K display
Last year my 2015 (or possibly late 2014) iMac died after a decade of service. Around the same time I acquired a new Mac mini. Unlike the iMac, the Mac mini doesn’t have a built-in monitor. I needed to acquire a new one. Unfortunately even newer displays in my price range would be a quality-of-life step down from the iMac screen I was migrating away from. New 5K monitors are $800+ and better quality ones – such as the $1,600 Apple Studio Display – are much more expensive.
I opted to save money and reduce electronics waste by repurposing the still-intact iMac screen. Sadly, when Apple released the “Retina Display” 5K iMac in 2014, they discontinued the functionality that allowed iMacs to serve as displays for other computers¹. Using it this way now requires buying a “driverboard” to serve as the liaison between my Mac mini and the iMac screen, gutting the iMac, and installing the driverboard inside the empty chassis.
Fortunately, this is territory many have trodden before and there’s many public posts detailing the process. I largely followed the instructions in this blog post from Scott Yoshinaga, which was enormously helpful. The entire process took me a few evenings over the course of three weeks – with waiting time for deliveries between steps.²
The major exception to my following Yoshinaga’s blog post was this: rather than purchasing a driverboard similar to the one he used from eBay, I searched AliExpress for boards and found (among surprisingly many options) one that supported a connection via a single Thunderbolt/USB-C DisplayPort cable. This reduced the number of adapters and cables I’d need in order to use it with my computers, which all have Thunderbolt ports. Most listings included an instruction to send a photo of your monitor panel to the shop in advance to verify that you were purchasing the right board, which I did and found reassuring. I was still nervous and so it was a pleasant surprise when it arrived and worked out-of-the box!
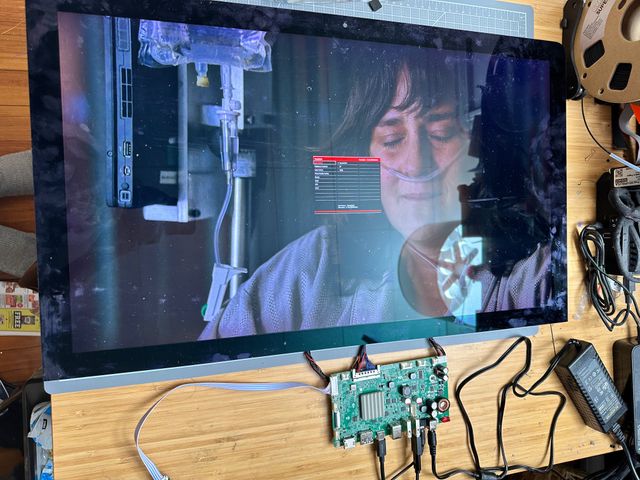
It works!
The breakdown of costs for this project:
| Part | Cost |
|---|---|
| Driverboard | $147.61 |
| USB-A extenders (1ft) ×2 | $ 6.33 |
| Audio cable extender (1ft) | $ 6.36 |
| Thunderbolt cable (6ft) | $ 28.68 |
| 12V 6A AC adapter | $ 15.50 |
| iFixit iMac repair kit | $ 21.24 |
| Total | $225.72 |
Quite a bit cheaper than a new $1,600 display! I did cheap out on the board and get one that only supports 8 bit color depth rather than the full possible 10 bit. Frankly I’m not sure I fully know what that means and I can’t really tell the difference. The screen looks great. (And for reasons I’ll explain later, maximizing color accuracy didn’t seem worthwhile for this screen.) I had a few things already that saved me some money in purchases:
- iFixit screwdriver kit³
- Zip ties/zip tie anchors
- The iMac
Even if I had bought those, this still was much cheaper. Even purchasing iMacs of that generation can be done readily for $200–400. If you’re lucky you can find a broken one that has the screen intact for even a bit cheaper⁴.
The project was overall successful, though there are a few things I’m somewhat dissatisfied with:
The driverboard included USB-A ports for mouse and keyboard peripherals as well as an audio jack – all of which connect through to the computer that’s attached via USB-C/Thunderbolt. This allows the display to also serve as a peripheral hub. That’s not a thing I’m dissatisfied with; it’s actually extremely nice! I purchased 1 foot extender cables to expose those ports outside the chassis. Unfortunately once I had it completed I noticed that my speakers produce a constant high-pitched tone when plugged in. I wish I had noticed this before I sealed it up! Maybe next time I open it, I’ll see if it’s fixable, but until then I can’t use the audio port in that state. The USB-A ports work great, though.
The attached buttonboard is pretty awkward and the ribbon cable it came with is pretty short. I have it poking out of the chassis, but haven’t figured out any ergonomic place to attach it. I wish it supported OS control of the brightness and contrast, because adjusting them with the buttonboard is a process.
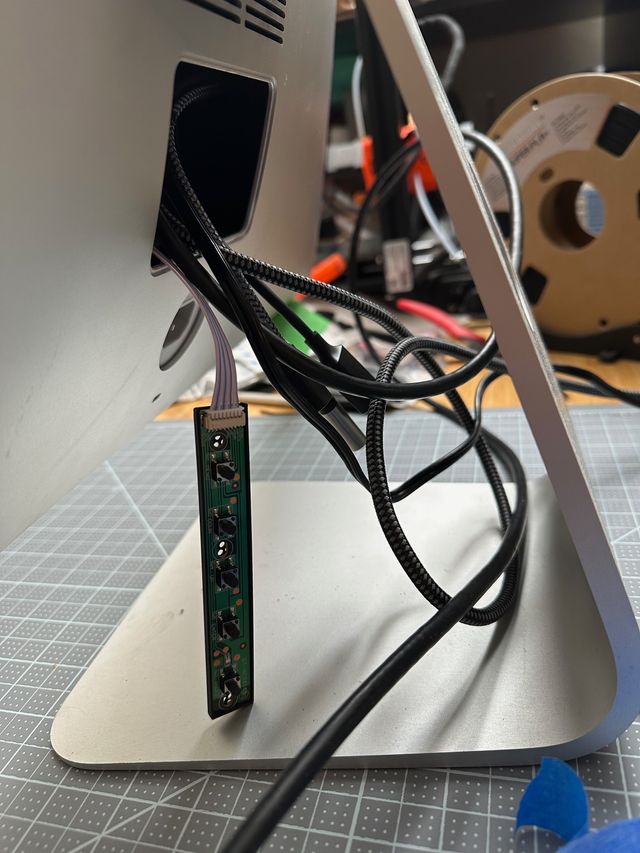
I may 3D print some parts to tidy this up a bit later – in fact you can already see that I printed a backing for the buttonboard to make it sturdier.
The chassis is larger than necessary since it used to have full iMac internals in it. It would have been pretty cool to figure out a way to build a custom chassis that was smaller and lighter – and more naturally incorporated the buttonboard and ports. But that was a bigger project that I was up for and I haven’t seen yet anyone who has done so.
One reason I didn’t prioritize maximizing the display’s color capabilities was that it already has some image quality issues. I’m not sure if these were production defects I didn’t notice until late or issues it acquired over its lifetime – I got it used, so I also don’t know everything it’s been through. there’s a pinkish tint to the edge of the panel and a splotch in one corner that looks like moisture damage or something. These are really only noticable when looking at something with a bright white background, however.

The defects in question.
The driverboard also has a speaker port, which I assume could be connected to internal iMac speakers. It didn’t come with a cable to do so, however, and it didn’t seem worth figuring out what I would need and how to fit the board and speakers both in the chassis, just to have access to speakers that are lower quality than my existing desk speakers.
Though I largely plan to use the monitor via the USB-C/Thunderbolt cable, I exposed an HDMI cable as well, just in case.
In spite any flaws, overall, I’m delighted with how this project turned out. It saved me a lot of money on a new display and I had a lot of fun with the process of doing it. I’m even considering buying another used iMac to build myself a second 5k display!
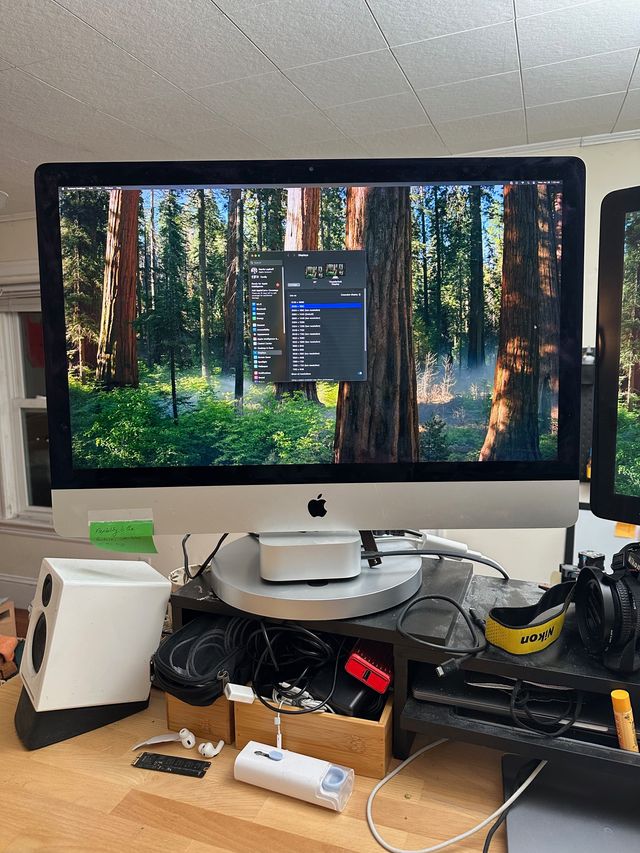
Fully sealed up and working!
A few more photos of my process:
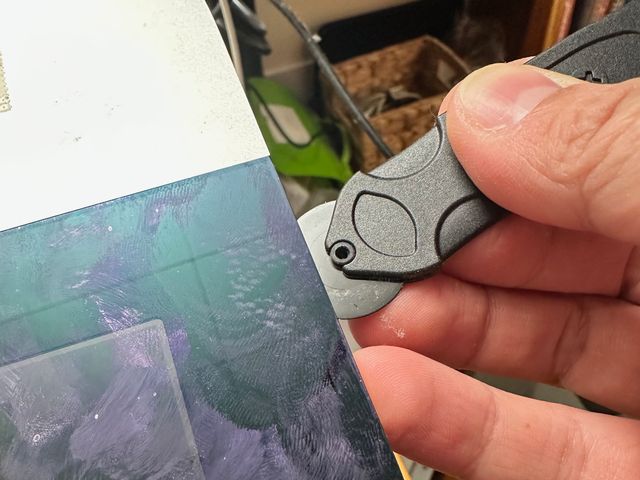
Cutting the adhesive between the glass panel and the chassis using an iFixit iMac fix kit.
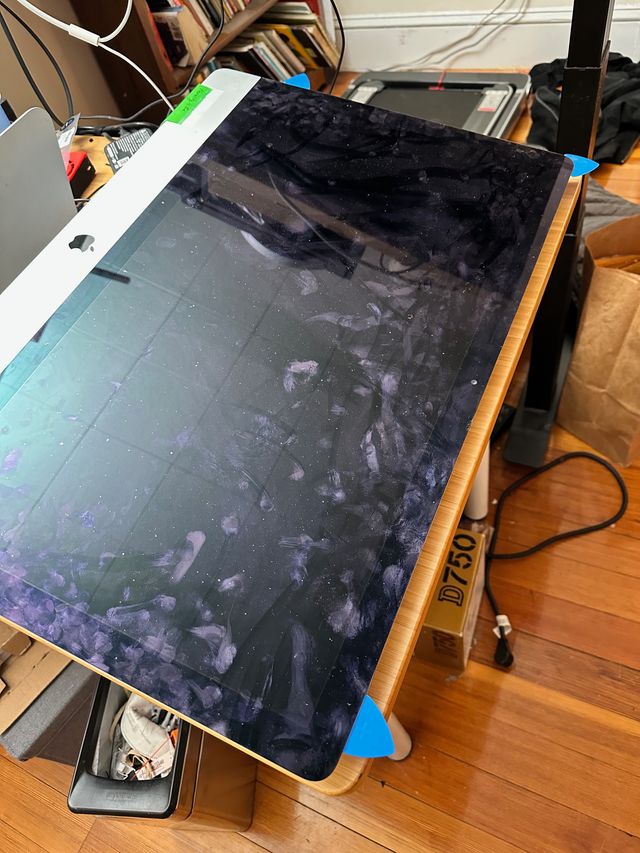
Gently and gradually separating the glass from the chassis with iFixit Opening Picks.
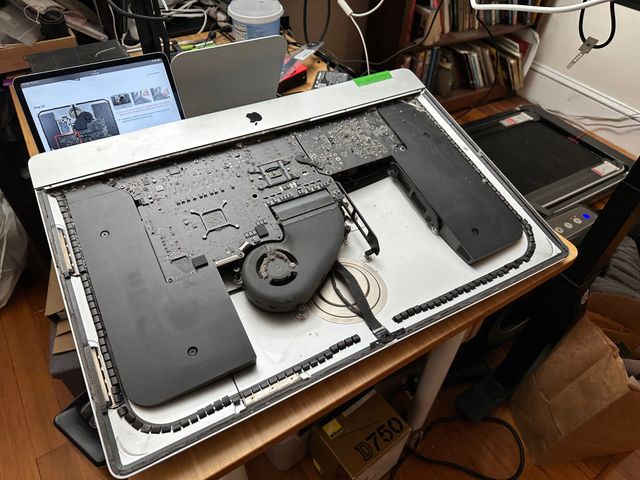
An iMac full of components.

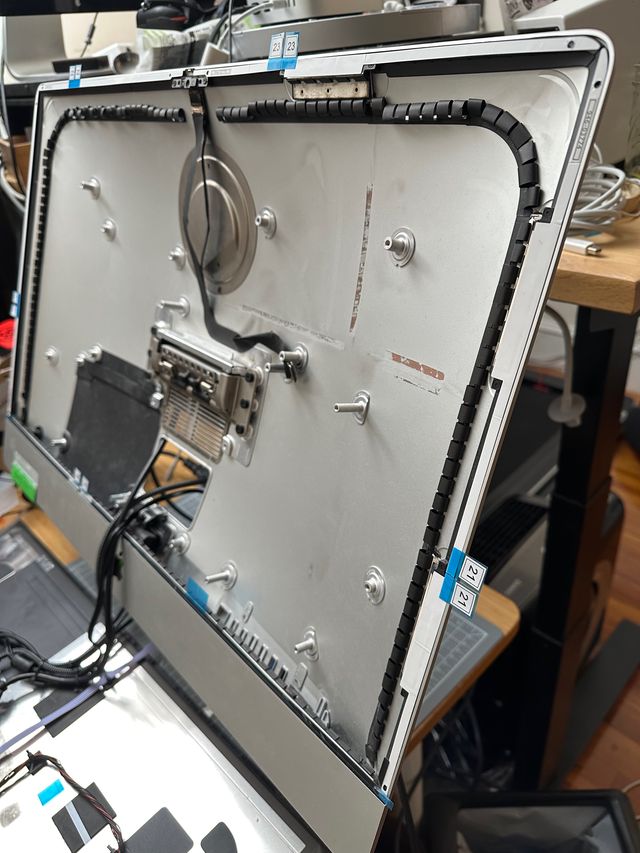
Glass screen panel, seen from the back.
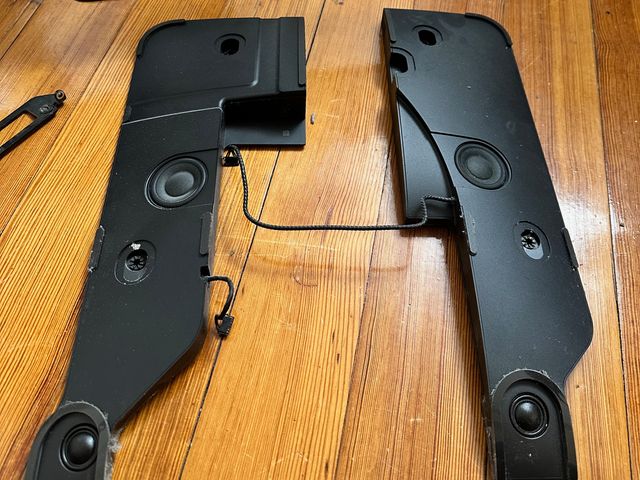
The two internal speakers, charmingly asymmetrical and contoured to fit inside the iMac.
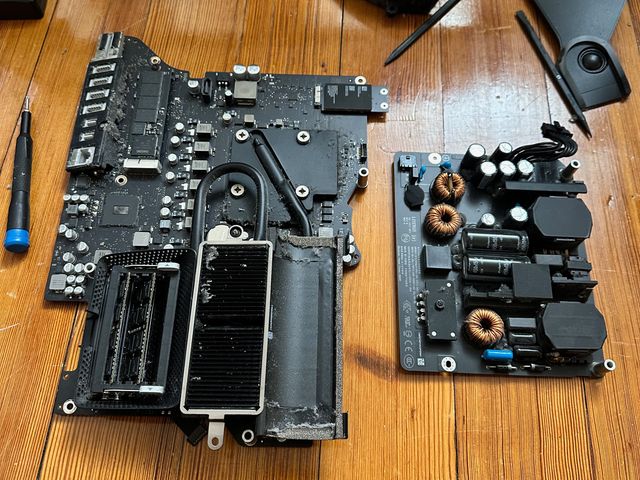
The motherboard and power management unit.
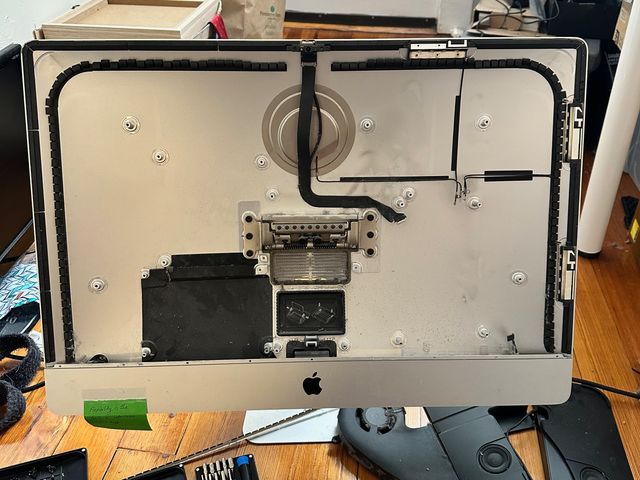
The iMac with most of its stuff removed.
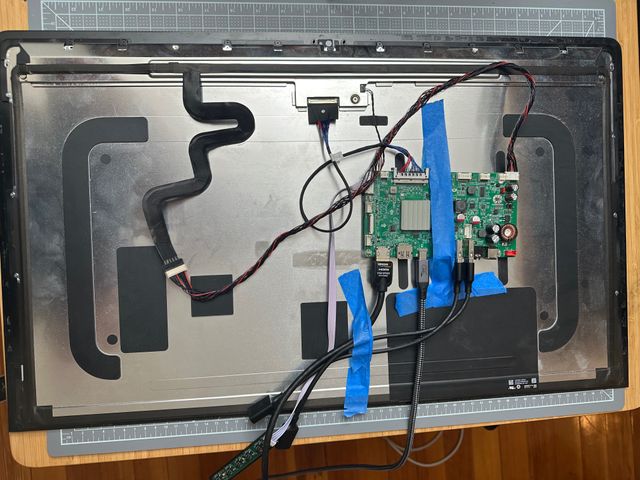
Testing the placement of the driverboard by taping it down before holding the panel on the chassis.
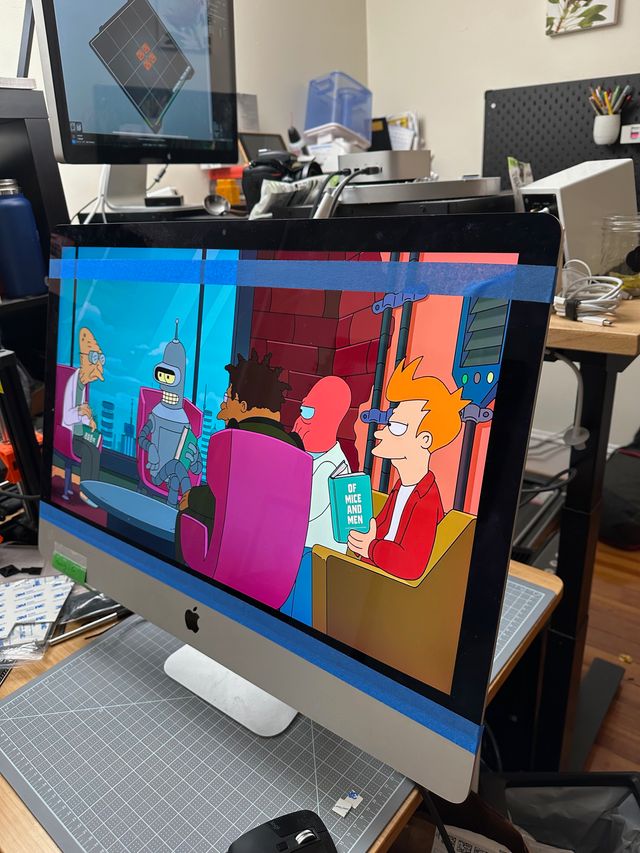
The board fits in the chassis and it works while assembled! This was just testing though, so I’m holding it on with tape so it doesn’t fall off and shatter, since there’s no adhesive yet.
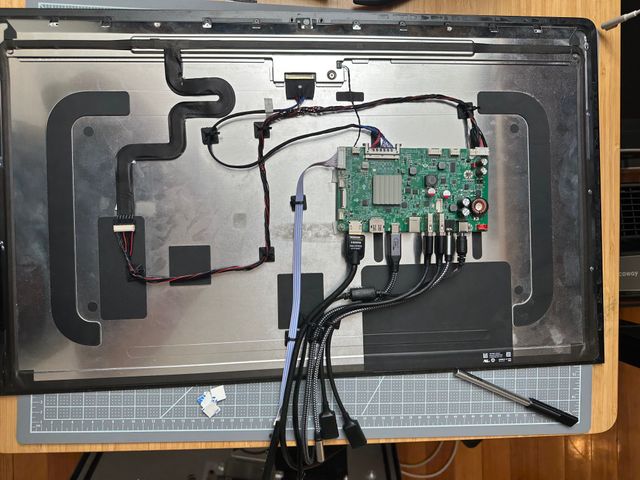
Now that I know it fits, I lock down the position of the board and cables with double-sided tape and zip ties. (I 3D printed the zip tie anchors!)
Time to attach the adhesive!
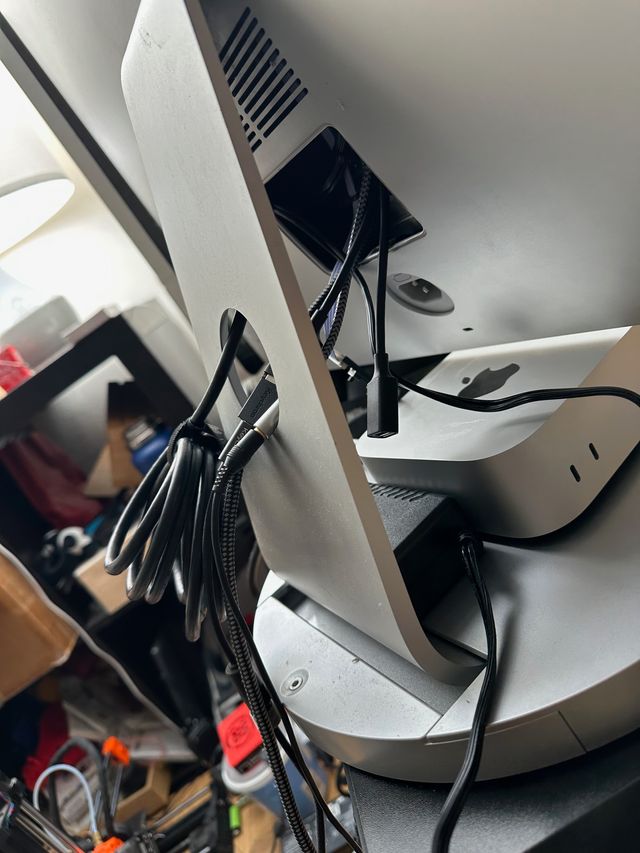
Another shot of the back, slightly tidied up.
I believe, at the time, this was understandable, as none of the external ports on an iMac could support 5K video. It is a bit of a shame that they have never added this feature back though given the evidence that for all-in-one computers, some components are exhausted faster than others. ↩︎
As well as some out of town travel that delayed me. ↩︎
Though in the event it did not contain the humongous T25 6-pointed star bit needed for one of the screws in the iMac and I had to improvise by using a slightly off-size triangular bit instead. ↩︎
Though my experience is that those ones get snapped up pretty quickly and ones listed “for parts” on eBay usually have a cracked screen – which, alas, is the part I want. ↩︎