Designing Christmas Ornaments for Vase Mode
Just want the files? Get them on Printables ↗
I designed a set of 10 Christmas ornaments that can be 3D printed in vase mode for Printables’ Winter Holidays Decorations contest.
I knew when I started my design process that I wanted to design something that could be printed in vase mode. There were lots of ornaments posted to the contest already, but very few in vase mode. I’ve written about vase mode before, but to recap:
Typically in the type of 3D printing I do (called FFF/FDM¹) plastic filament is extruded one layer at a time, stopping when it completes a layer, moving the z-axis up one step, and then extruding a new layer on top of it. This results in at least one extrusion stop and start per layer (generally more than one, since the layers are usually complex enough to require multiple paths per layer). Vase mode instead takes a solid object and extrudes one continuous spiral around the perimeter of the object without stopping. This has some advantages:
- Vase mode prints have no visible “seams” where extrusion stopped and started on each layer,
- They’re generally quicker to print because there’s no travel time for the printhead, only print time, and
- They use less filament because they’re only printing one perimeter per layer and no infill.
On the other hand:
- Only objects with a single continuous surface can be printed in vase mode,
- The final prints are often weaker than solid counterparts,
- There are restrictions on the geometries that limit what can be printed in vase mode.
One particular restriction I had to think about for this case was the slope of the walls. Here’s a cross-section of 3D printed walls at different angles (note, filament tends to extrude in a oblong shape as it gets squished against the surface below it and the nozzle above):
At the steeper slopes, there’s plenty of overlap for each successive layer to grip onto the previous one, but at shallower ones there’s a less, and at the extremes, you’re printing over thin air. Slope is always a concern in designing for 3D printing, but the problem is amplified when thinking in vase mode since the perimeters are only one wall thick and there’s no internal infill to support the structure.
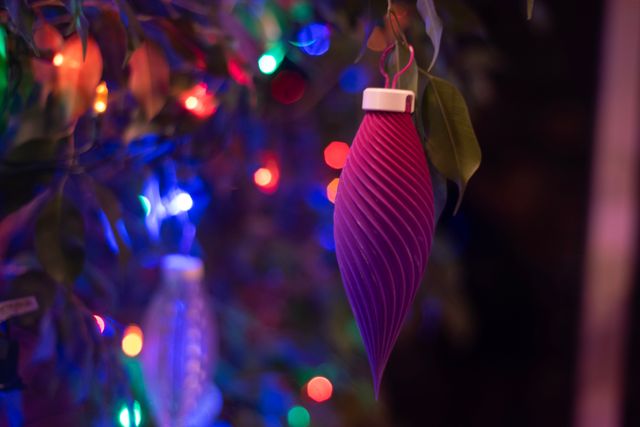
Vase mode prints are usually open on the top (hence “vase”) since they can’t be sealed on top with either a flat or shallow surface. I wanted mine to be closed on top (which is actually the bottom of the ornament, but they’re printed upside-down), but a sphere shape wouldn’t work – slopes get too shallow at the ends – so I designed them to come to a point, keeping the slopes safe to print in vase mode.
Even this design can cause some issues in vase mode, depending on the printer’s filament and configuration. If you look closely at the photo above you can see that the point has a visible horizontal line where the slope is just a touch too shallow and you can see a “melty” look at the very top where the layers are too small to have time to cool before the next layer is printed. In other filaments, though, this design will print flawlessly. There’s many factors.
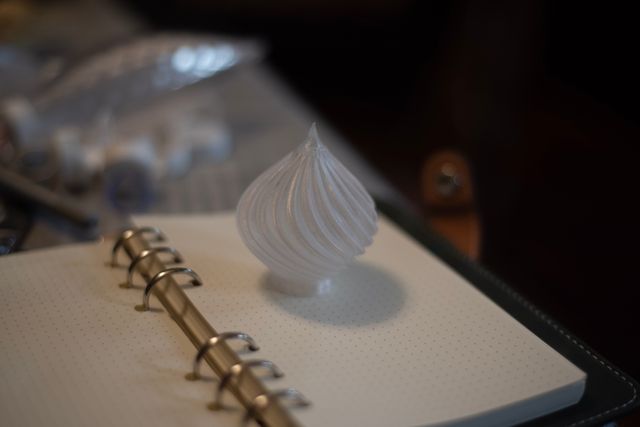
Once I had the basic shape determined (with help and feedback from Emma) I set to work designing five different patterns in two different sizes.
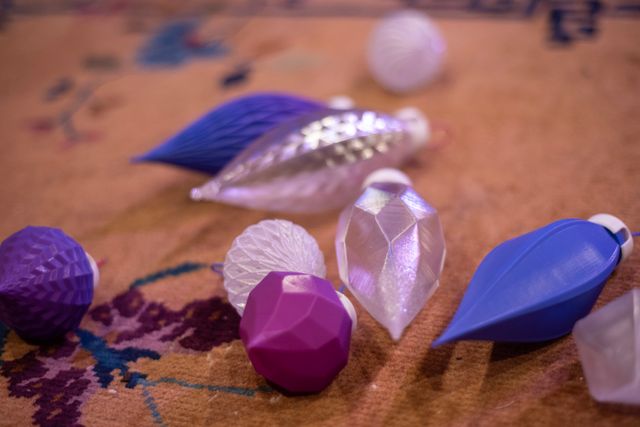
I also wanted a mechanism for how it would mount on a tree. Loops are pretty tricky to design for vase mode (though people have done some pretty impressive things) I ended up with a cap that snap-locked onto the base of the ornament and has holes in the top for an ornament hook and a pass through channel to be enclosed around a Christmas light strand instead. Designing the base that attaches to the cap required a solid model – but slicers allow you to print solid layers before the vase mode starts, so these baubles require 5mm of solid printing and then print vase mode the rest of the way up.
I wanted this to be entirely 3D printable. Sometimes 3D printed parts require additional components, but I love when something can be fully printed without a run to the store. So, in the event someone didn’t have any ornament wire around, I also designed a loop that snaps into the cap’s holes.
Note that the accessories are not vase mode printable.

You really only need either the light strand or the loop, but this ornament has both!
Having finished this project I’m especially pleased with how good I’m getting at writing OpenSCAD code. It continues not to be a way that I would advise anyone to do CAD work, and yet it also continues to appeal to my programmer brain. BOSL2 has been an indispensable part of my working with it – those folks really thought of everything.
I don’t know how Printables decides on their contest winners, but I put a fair bit of effort into these and it would be nice to get some attention for them, so, if you feel so inspired, take a look at my entry below, print them out yourself, and post a make. There’s still time before christmas to get them on your tree 😊🎄
Fun fact: When this approach was first invented, it was called “FDM” for “Fused Deposition Modeling.” But the company that originally patented it also trademarked the abbreviation, so other companies call it “FFF” for “Fused Filament Fabrication,” but the FDM abbreviation remains popular in casual conversations about 3D printing. ↩︎