A Selection of 3D Printing Designs Spring 2024
Here’s a small collection of quick designs I’ve made since I wrote my previous 3D printing blog post “Solving Niche Problems Quickly With 3D Printing.”
An IKEA Skådis Sticky Note Holder
I designed this sticky note holder for my office pegboard. I made the pegs to be printed separately, both because I want to develop a modular system for creating pegboards accessories¹, and because it allows me to print the pegs in the strong direction (laying flat) and without a need for supports for any of the parts. I glued them together with Gorilla Glue.
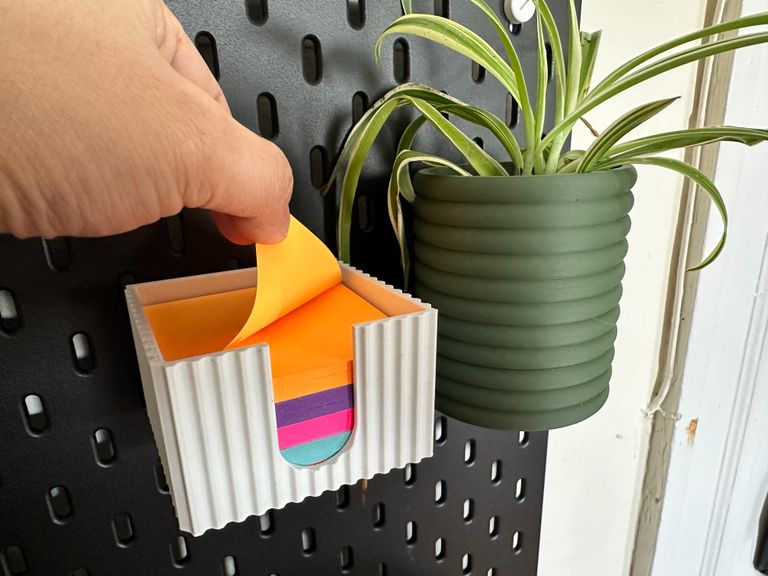
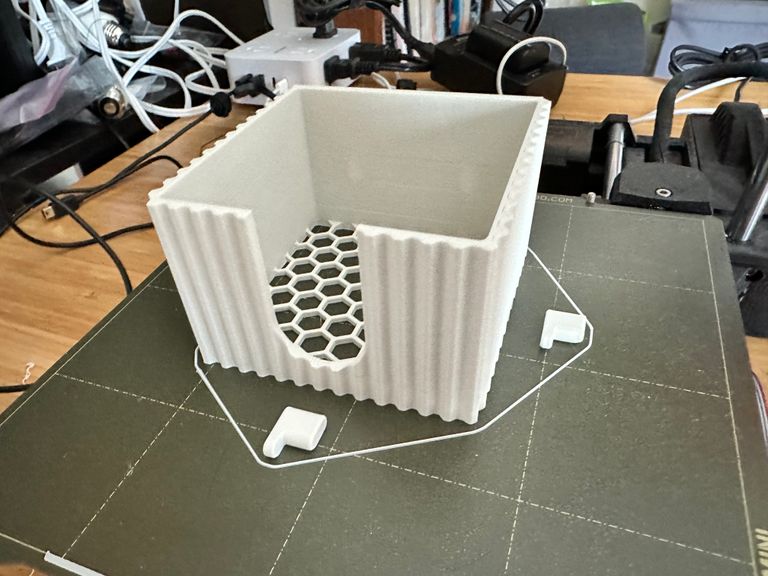
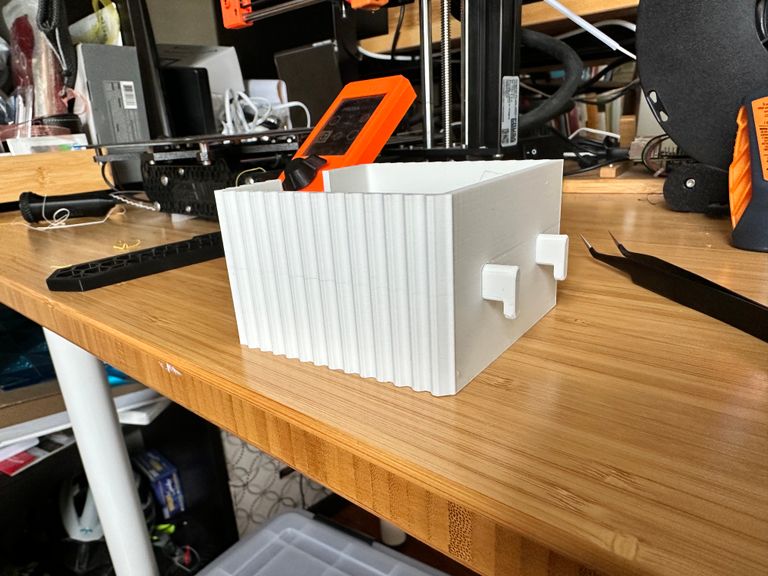
The files are available in a few sizes on Printables.
A Stand for an Articulated Manikin Hand
My housemate acquired this articulated wooden hand. Unfortunately it came with some mounting hardware that, even with some effort, she wasn’t able to remove herself. She requested a 3D print of a stand that the screw could fit into so she could pose the hand upright.

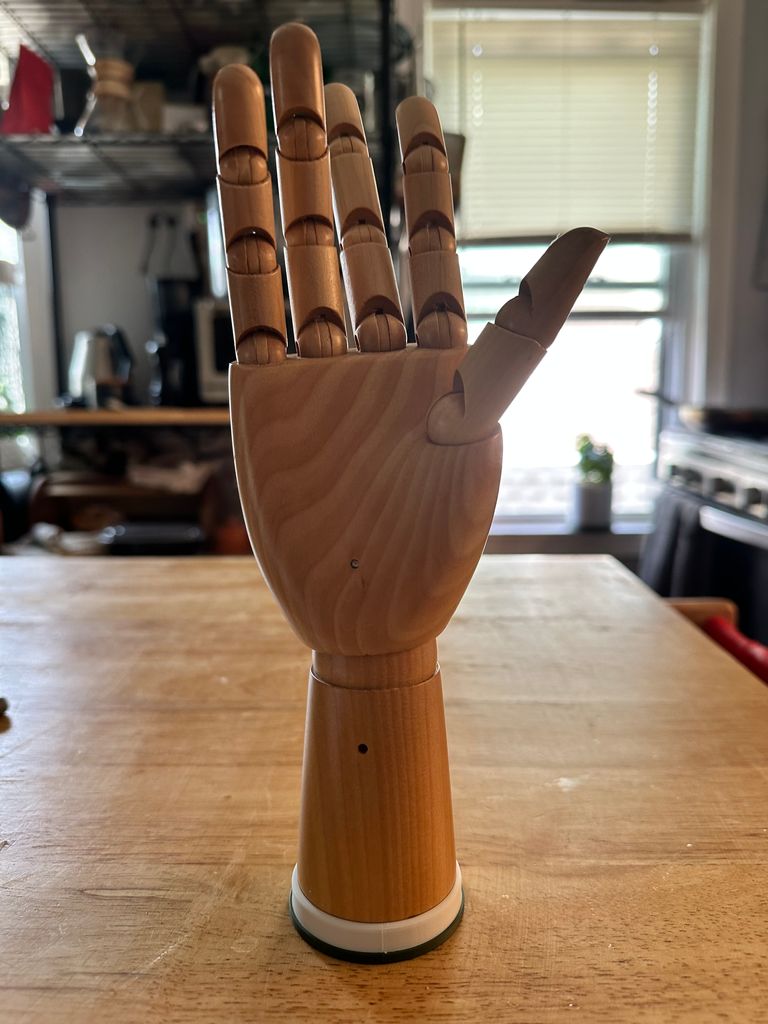
I was pleased that I was even able to get the pitch and size of the screw threads correct so that it actually screws into the printed base.²
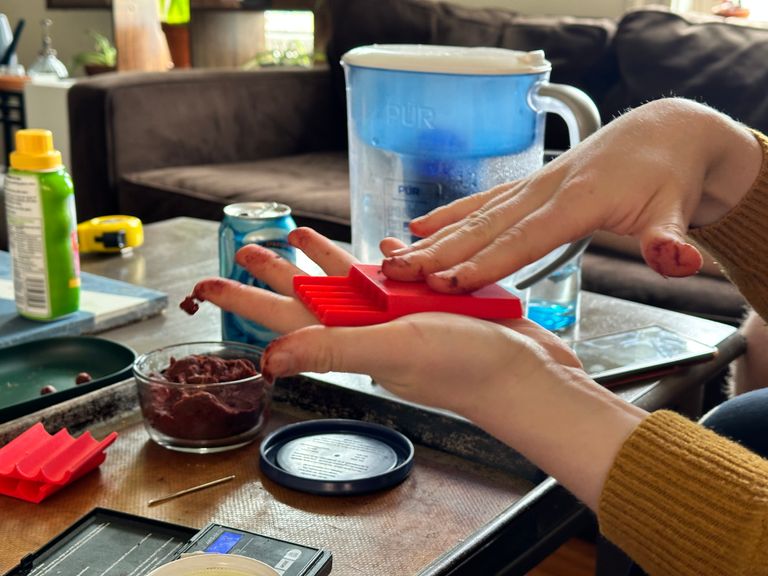
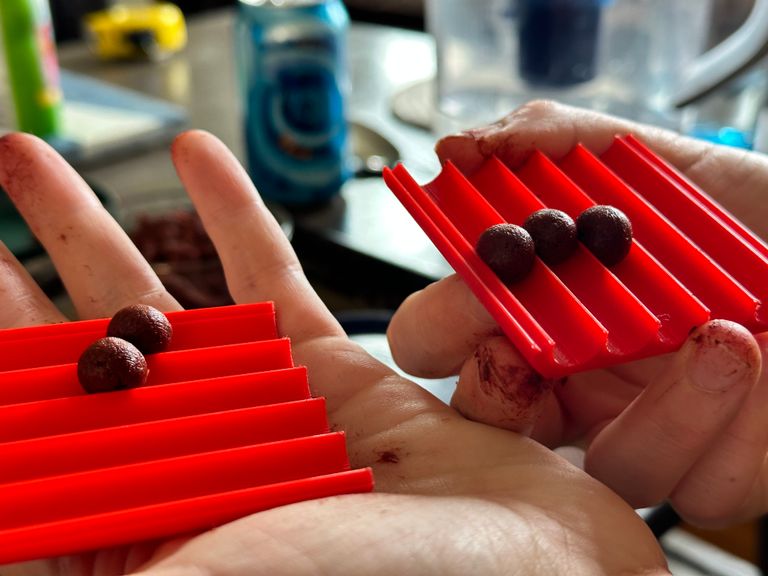
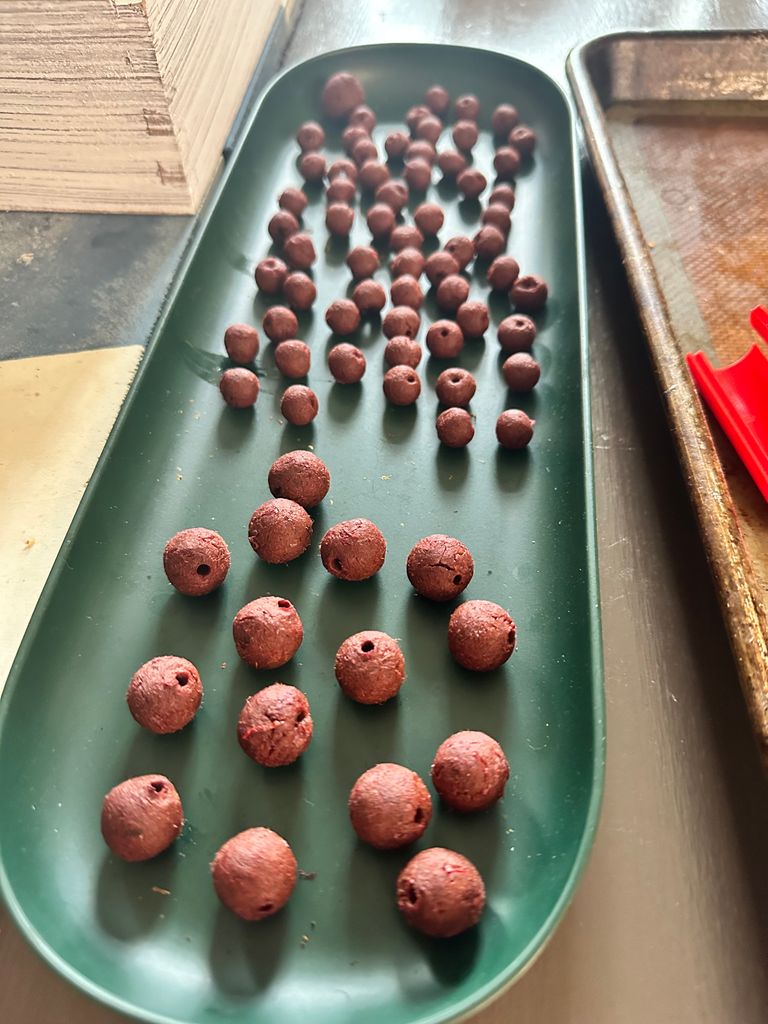
A Clay Bead Roller

This was another project for my housemate. She’s recently been making beads out of flower petals³ and wanted a tool for making them round. I made these clay bead rollers. They’re used by putting a dot of clay in each channel and then rubbing the two interlocking parts against each other to make the clay in each channel into a sphere.
The files are available in a few sizes on Printables.
Decorative Easter Eggs
This is the oddball on this list. It’s a set of designs that are purely decorative. I entered these five patterned eggs into the Printables Easter decorations contest. I didn’t win the contest, but these are my most popular designs on the internet – by a wide margin.
I really overthought the code for this one, replicating a formula for the shape of an egg found in this math paper.
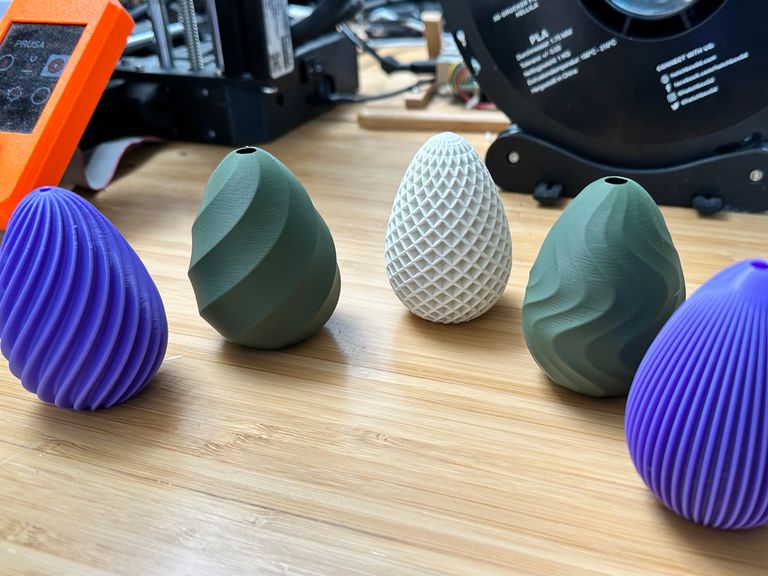
All five designs are available on Printables.
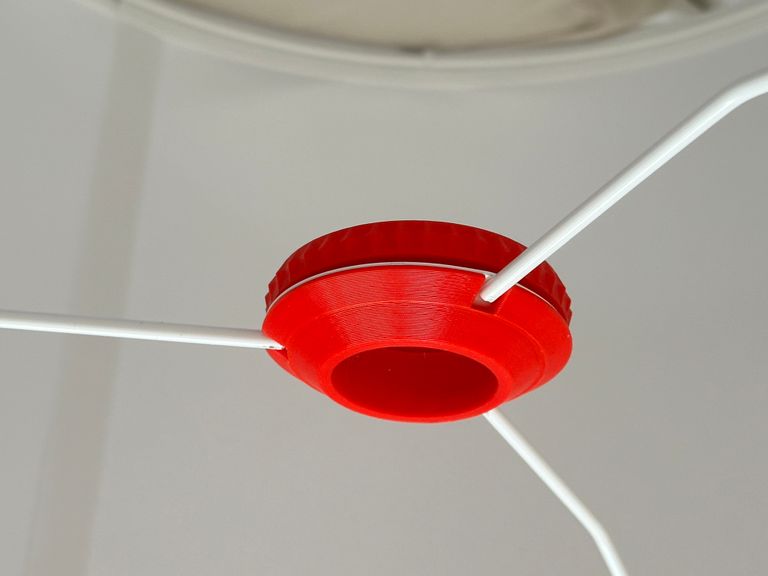
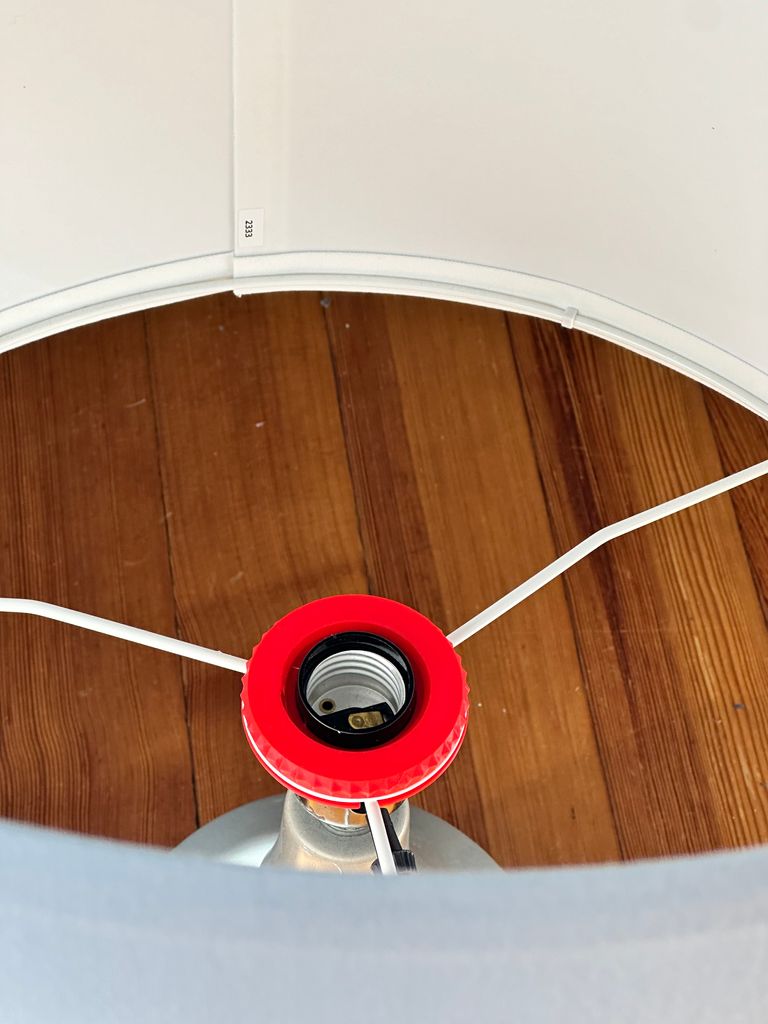
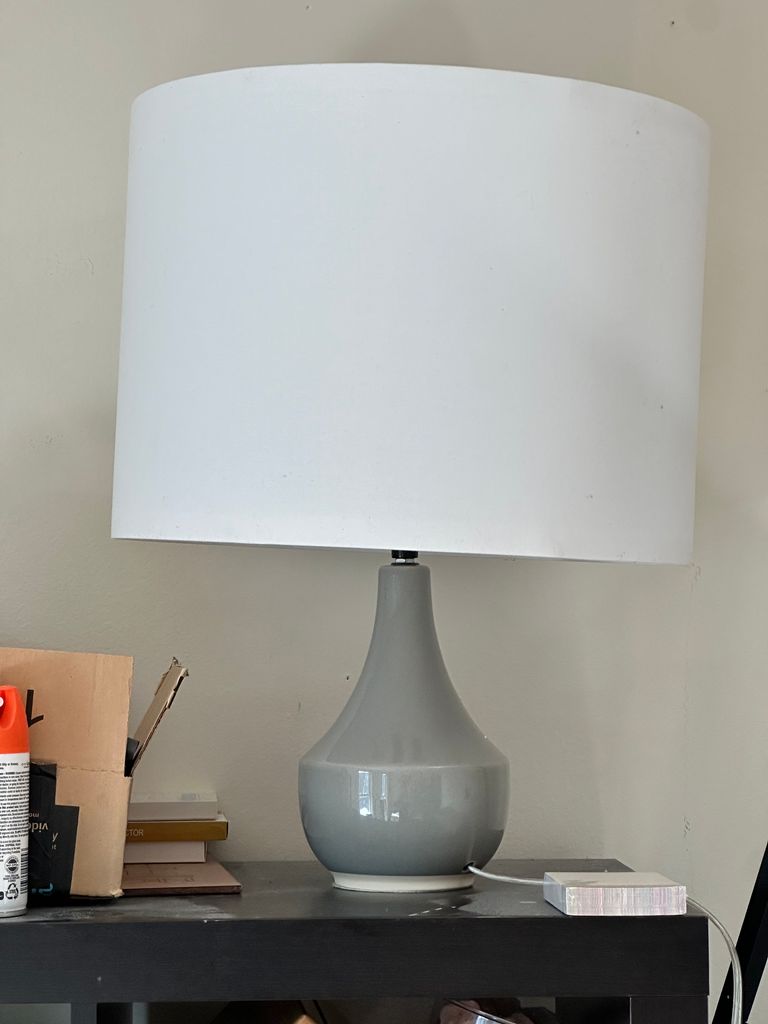
An Adapter for an Oversized Lampshade
A while back Ruthie gifted me a “lumenator”⁴ which she built from a 7-to-1 light socket splitter and seven bright LED bulbs. She intended it to be hung from a ceiling, but I wanted to mount it on a table lamp base. I needed a lampshade because it was otherwise uncomfortably bright to have in my field of vision.
I got a large shade from IKEA but discovered the part where it would fit onto a socket was too large for my small lamp. So I quickly designed and printed this two part adapter that screws together around the lampshade’s mount and fits it onto my lamp.
I got the tolerances off so it’s a little tippy, but I am pleased with how serviceable it is for 30 minutes of CAD and no revisions.

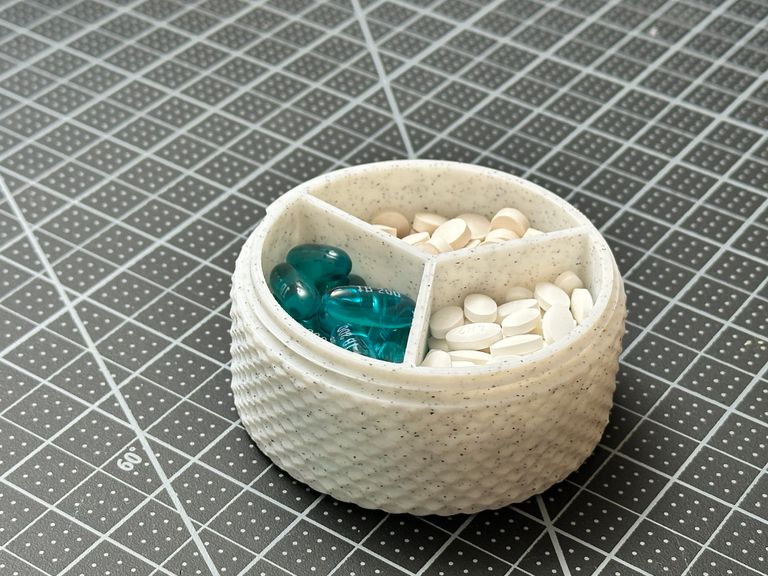
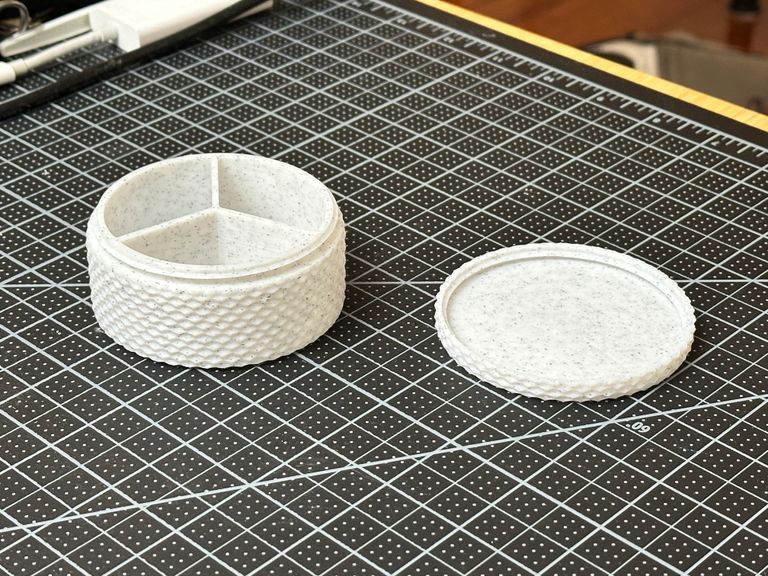
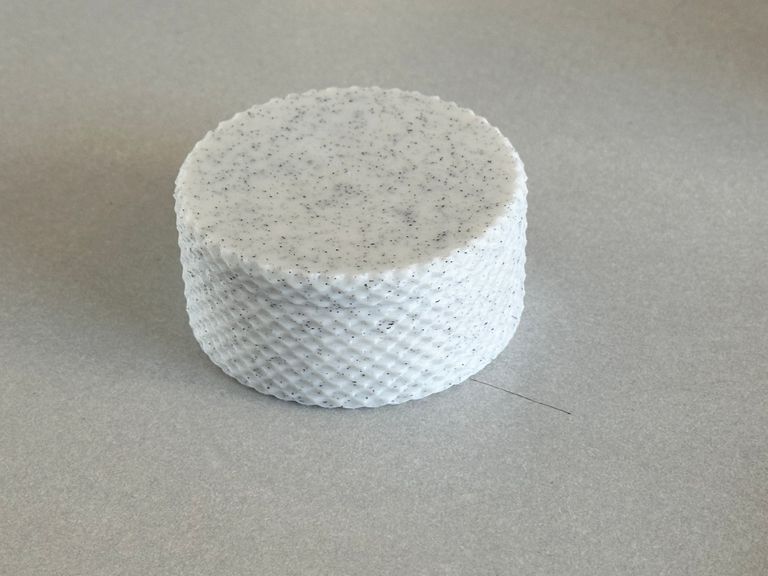
A Travel Pill Case
Typically when I travel I take three pills with me for use as-needed (not on a schedule). A weekly pill organizer isn’t optimal for this, but neither is bringing three separate pill bottles. There were a few designs available online for travel pill cases like this, but I wasn’t fully satisfied by them so I made my own with these features:
-
Attractive exterior texture
-
Three compartments for my usual travel meds (ibuprofen, cetirizine, and melatonin)
-
Rounded inner compartments to ease sliding pills out
[Javascript required to view 3D model]
Anything You Want?
So far I’ve avoided opening a store to sell anything I design, but if you’re interested in anything I’ve made – especially if you’re a personal friend and I can give you the item in person or folk post it your way – please let me know! I’ve really been enjoying designing and printing physical objects and love excuses to do more of it.
Still in progress. ↩︎
Though if I were making this for durability I probably would have purchased a metal threaded insert – plastic threads wear down easily or split at the layer lines under pressure. ↩︎
In a process that involves boiling the petals, pulverizing them, and then letting the pulp dry to the consistency of clay (and possibly some other steps I’m not aware of). ↩︎
There’s a number of articles online about this concept, but essentially the idea is to make an ultra-bright light to stave off Seasonal Affective Disorder or just the after-sundown sleepies – it’s much brighter than a conventional SAD lamp. ↩︎